
Like always, I spent a long time pondering how I'd go about building up this piece. I try to figure out enough to get construction started and not get stuck in a paralysis-by-analysis state.

I figured out the dimensions for Thomson building, the Canadian Press complex, and the yet to be started Newhart Tower in February and cut all the blanks at that time. I did that for two reasons: I figured it was more efficient to cut them all at once when I had the workshop set up for that task, and I wanted to get the relative heights of all the key highrises clearly established so I had a sense of how the layout's vertical dimension would play out.

On the prototype the light coloured panels are closer to cream than off-white, but my choice was based on what I had on hand, and thought it was good to make them a little lighter so the contrast with the buildings on either end of the complex is stronger. Once they're weathered, they'll seem a little closer to the prototype.

Before installation they were painted with a Tamiya flat aluminum paint. Next time I'm going to try colouring these sorts of pieces with a silver Sharpie pen. I didn't have one around the house to give it a try.

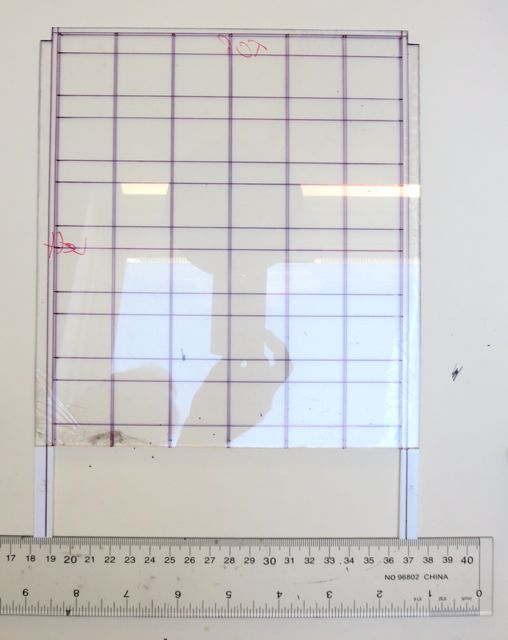
After attaching the strip to the blank, a small wooden ruler was used as a guide to make sure the strip was straight and aligned to the guidelines. A sharpened toothpick was run along the edges of each glued down styrene strip to scrape off any glue that got squeezed out during attachment.
Lest you think all went smoothly, there was a minor disaster about halfway through the gluing process. Not shown in the photos is a small container of water I used periodically to clean glue from the brush. In a moment of thoughtlessness I knocked over the container and water splashed all over :-( Much cursing ensued. After cleaning up and taking a break I put a masking tape ring about the water container to help make it a little more resistant to tipping. No more spills on this project, but it emphasized to me the importance of making sure the work area is clean, and only the necessary tools and materials are present when working on some particular task.


For the rightmost building in the complex I've ordered a City Classics kit that when modified will act as a reasonable stand-in for the prototype that's in that location. But, until it's delivered I think I'll move onto getting these facades attached to buildings.
No comments:
Post a Comment